Group Members: Thomas McSwiggin, Brandon Herrick, Mark Aruda, Pat Anderson
Summary of this week's progress:
Our whole group met on Tuesday 11/12 to finalize our design, make a list of necessary parts, and write our code
The project that we're working on is an elevated handicap lift that you see on most transportation busses. These lifts can span a height of 4 to 5 feet where ours will span maybe 2 to 3 inches. They're run on a two bar system that keeps the ramp level at any height. Usually this two bar system is run by hydraulics, but for our project we're using high torque servo motors. The ramp will be retractable so it will be able to fit in small spaces.
The parts that we'll be using are:
2 decent servo motors that have 180 degree turning radius
4 Long Lego Shafts (haven't decided size yet we'll figure that out in drafting)
2 offset Lego pieces ( Around 20 degree bend)
2 brackets made from the 2D laser cut out
1 platform made from 3D laser printer
10 Lego connector pieces
2 Different sized gears (small to big = torque )
1 External Battery (may need to run two servos smoothly ?)
(Optional): 1 Nicer potentiometer and 1 Nicer push button
The code outline is as follows:
The potentiometer will control the main double arms from going up and down so one servo will need to be mapped to this and this servo will have the gears attached to it so it may not even need the full 180 degree rotation. The push button should control the ramp from going up and down so a Boolean call will be sufficient for this, the servo will probably go 90 degrees. A button de-bounce will be needed. A green and red/yellow LED will be used to indicate whether the ramp is fully down or fully up (green for go) otherwise if the ramp is not in those two positions the red/yellow LED should be lit. I'm not sure at this point if we need to use the LCD screen, but well worry about that later.
The code will be posted later on when we figure out GitHub.
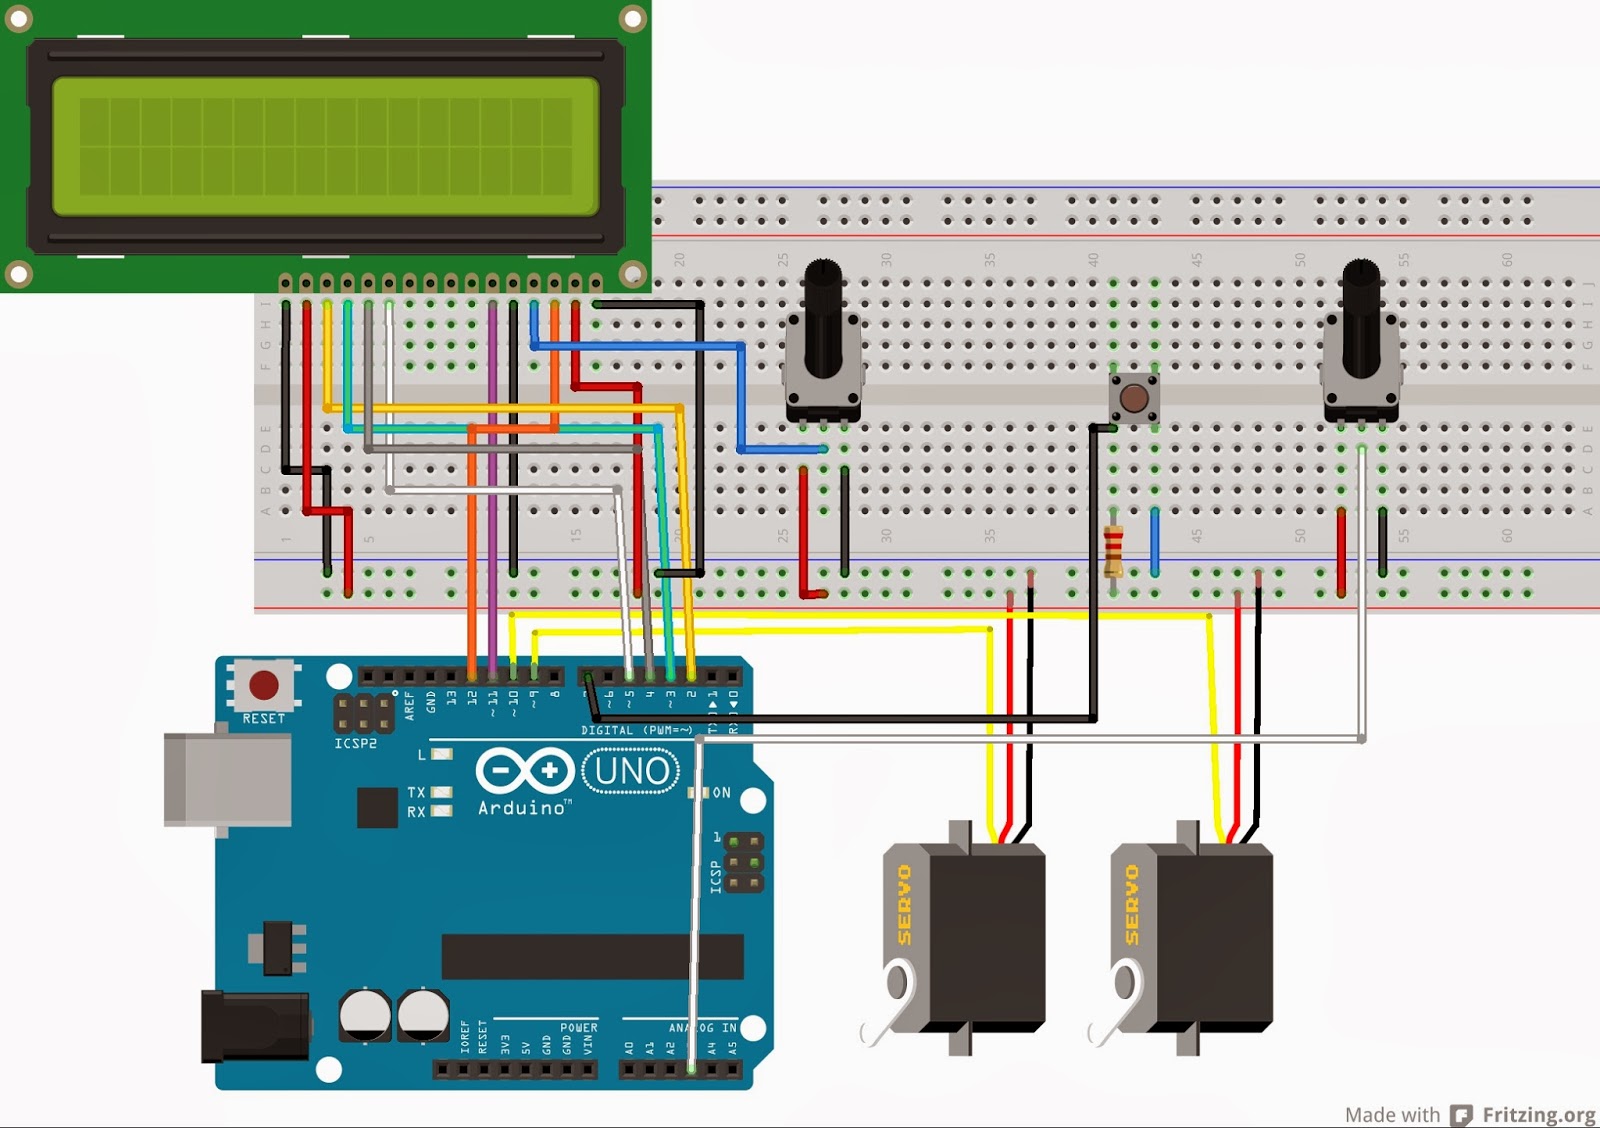
A drafted picture (Figure 1) and a legitimate picture (Figure 2) can be seen below.
 |
| Figure 1. Quick sketch of design |
 |
Figure 2. Real version of the lift
|


